Customize SharePoint 2013 lists using Client-side rendering
Customize SharePoint 2013 lists using Client-side rendering
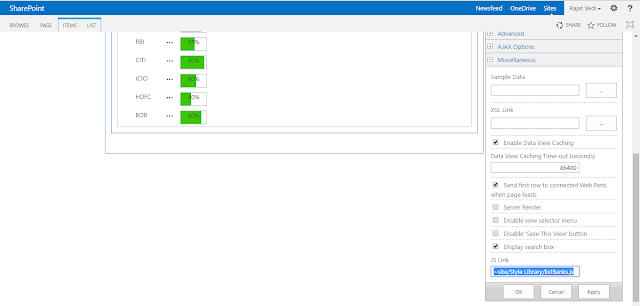
Note- use this( ~site) – if the .js file is located on the site where your list view Web Part exist.
use this(~sitecollection) – if the .js file is located in the site collection level.
Client-side rendering is a new concept in SharePoint 2013.
It’s provides you with a mechanism that allow you to use your own output render
for a set of controls that are hosted in a SharePoint page (list views,
display, add and Edit forms). This mechanism enables you to use well-known
technologies, such as HTML and JavaScript, to define the rendering logic of
custom and predefined field types.
JSLink files have the ability to quickly and easily change
how a list views and forms are rendered. More specifically how the fields in
that list should be displayed.
Go
to SharePoint list and edit the page. Now edit list web part as below and
provide JS link.
Code(listBanks.js)-
(function () {
var overrideCtx = {};
overrideCtx.Templates = {};
overrideCtx.Templates.Fields = {
'Popularity': { 'View': renderPercentComplete },
'Priority': { 'View': priorityFiledTemplate }
};
SPClientTemplates.TemplateManager.RegisterTemplateOverrides(overrideCtx);
})();
function renderPercentComplete(ctx) {
var fieldVal = ctx.CurrentItem[ctx.CurrentFieldSchema.Name];
var Popularity = fieldVal.toString();
var html = '';
html += "<div style='width:100%;height:27px;border:1px solid #AEAEAE;position:relative;'>";
html += "<div style='background-color:#3ac600;height:100%;width:" + Popularity + ";'></div>";
html += "<p style='width:100%;text-align:center;position:absolute;top:0px;left:0px;margin:0px;'>";
html += Popularity;
html += "</p>";
html += "</div>";
return html;
}
function priorityFiledTemplate(ctx) {
var priority = ctx.CurrentItem[ctx.CurrentFieldSchema.Name];
// Return html element with appropriate color based on priority value
switch (priority) {
case "High":
return "<span style='color :#f00'>" + priority + "</span>";
break;
case "Normal":
return "<span style='color :#ff6a00'>" + priority + "</span>";
break;
case "Low":
return "<span style='color :#cab023'>" + priority + "</span>";
}
}
Note- use this( ~site) – if the .js file is located on the site where your list view Web Part exist.
use this(~sitecollection) – if the .js file is located in the site collection level.


Comments
Post a Comment