Posts

Clear DataTable on button click

Image
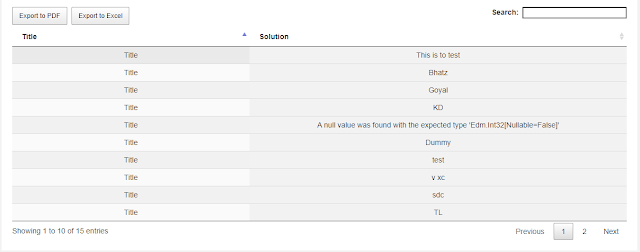
How to clear DataTable on button click In this post we will learn how we can clear a datatable on a jQuery event. By click on "btnReset" we have to call datatable's destroy method to completely clear a datatable. We may need to clear a datatable on an event. Please follow the below code to achieve the same. HTML - <table id="tblResourcesData" class="display" width="100%" cellspacing="0">           <thead>               <tr>                   <th>Title</th>                   <th>Region</th>                 <th>Country</th>                <th>Email</th>             </tr>           </thead>  </table> Code - $("#btnReset").click(function(){                     $('#tblResourcesData').DataTable().destroy();                        $('#tblResourcesData tbody').empty(); });  

Get more than 5000 list items in SharePoint using Deferred Promises jQuery

Image
How to more than 5000 list items in SharePoint using Deferred Promises jQuery In the below post you will learn how we can get more than 5000 list items using REST api. As we know that in SharePoint, number of items we can fetch at one time which should not be more than 5000 items that default architect of SharePoint list says. But in some of  the requirements we may need to get more than 5000 list items. When we Query large list by rest "/_api/web/lists/getbytitle ('<list title>')/items" on the list which has more than 5000 items, we get following exception "Request failed. The attempted operation is prohibited because it exceeds the list view threshold enforced by the administrator". So to resolve the above error you will learn to how code to get more than 5000 records. Code -  var TotalCAPItemCount = 0; $(window).load(function() {         var ItemCount = GetItemCount('CAP');          createRestUrl(ItemCount,'CAP');    }); //Step 1. ge

Upload multiple attachments to SharePoint List Item using REST API jQuery, along with People Picker Column

Image
How to Upload multiple attachments to SharePoint List Item using REST API jQuery, along with People Picker Column In this post I will show you how we can upload multiple attachments on a SharePoint List item, I am taking a People Picker field here where you can store multiple SharePoint users along with other columns. Please refer the below code, It would be very helpful for you to implement the same in your projects. In the below code you will find how you can clear a input type file and people picker field.  JS Files need to be used -   <!-- SharePoint Specific Javascript Start -->       <!--script type="text/javascript" src="/_layouts/15/sp.runtime.js"></script-->         <script type="text/javascript" src="/_layouts/15/sp.js"></script>         <script type="text/javascript" src="/_layouts/15/1033/strings.js"></script>         <script type="text/javascript" src="/_

How to make Rest API call synchronous in SharePoint

Image
How to make Rest API call synchronous in SharePoint In this post, I will discuss how we can make a synchronous Rest API call in SharePoint using jQuery. Normally when we do Rest API call using AJAX calls in SharePoint, it executed asynchronously. So it is not possible to know whether the call has been made completely or not. Sometimes you might come across a requirement where you want to execute something after the call has been made complete. Here I will show some ways of make synchronous Rest API call in SharePoint - 1. Using then - getItems().then(getItemsSuccess, getItemsFail); function getItems(){ return $.ajax({ url:  _spPageContextInfo.webAbsoluteUrl + "/_api/web/lists/getByTitle('ListName')/items", type: "GET", headers: { "accept": "application/json;odata=verbose", } }); } function getItemsSuccess(data){ if(data.d.results.length > 0){   //do something here // } } function getItemsFail(err){   alert(&quo

How to use Deferred when done in JSOM SharePoint

Image
In this post we will see how we can use Deferred with when in JavaScript Object Model to make a synchronous call in SharePoint. As in many of the requirements we need to make asynchronous call to synchronous for easy of work. In the below example we will update multiple SharePoint list items one by one. Code -  var itemIDs = [1,2,3]; $(window).load(function() {      $("#btnSubmit").click(function(){                        $.each(itemIDs, function(index, value){                           $.when(updateListItem(value))        .done(function (data) {                   alert("All Items Updated);                    })        .fail(function (sender, args) {           alert('Failed');     });             });            });   });  var dfd = $.Deferred(); function updateListItem(value) {     var clientContext = new SP.ClientContext.get_current();     var oList = clientContext.get_web().get_lists().getByTitle('Advisory Panel');     this.oList

How to export SharePoint list data automatically using Power Automate

Image
Export SharePoint list data automatically using Power Automate In the below blog you may below steps to automate a SharePoint list export automatically using Power Automate and send the exported file via email. This can be implemented in your project which might save your time and make things easy. Please follow below steps -  1. Login to Power automate and search for Scheduled Cloud Flow. 2. Fill the schedule frequency based on your requirement. 3. Get SharePoint list items and filter them as per your requirement. 4. Create a HTML table and customize it accordingly. 5. Create a file on One Drive for Business and get the file content as shown below. 6. Send this file to the required group or person based on your requirement.  I hope by following above steps you can create a scheduler which can automate your export to excel process :) 

How to Create a flow that runs only once a week using Power Automate

Image
Create a flow that runs only once a week using Power Automate Under the recurrence we can set up the frequency of our flow, in the below flow will demonstrate how we can create a flow that runs only once a week at a specific day and time. We can customize the recurrence based on our BAU requirements.  Follow below Steps - 1. Sign in to MS Flows/Power Automate. 2. Click on "My Flows" - New Flow and choose "Scheduled Cloud Flow".    3. In the Recurrence set up the properties as below it will trigger the only once a week at the scheduled time.